Realtime Log Streaming with FastAPI and Server-Sent Events
Server-Sent Events (SSE) are often overshadowed by its two big brothers - Web Sockets and Long-Polling. However, there are many practical use cases for using SSE. Updating dynamic content, sending push notifications, and streaming data in Realtime are just a few of the applications that SSE can be utilized for. This post will explain SSE, when to use it, and implement a simple SSE application with FastAPI.
What is SSE
Traditionally, a web page has to send a request to the server to receive new data; that is, the page requests data from the server. With server-sent events, it’s possible for a server to send new data to a web page at any time, by pushing messages to the web page. MDN
What does this mean? Essentially, Server-Sent Events (SSE) enable users to subscribe to a stream of real-time data. Anytime this data stream updates, users can see new events in real-time. If you have worked with Long-Polling or Web Socket applications in the past, you may be wondering what’s the big deal about SSE?
SSE vs Web Sockets
Websockets are a bidirectional form of communication between servers. They are typically used to build chatrooms or multiplayer video games as these applications require constant communication between servers and clients. You can think of SSE as a unidirectional websocket. Only the server can send messages to subscribed clients. There are many web applications where web sockets maybe overkill. For example, updating the price of an item on a product page does not need bidirectional communication. The server simply needs one-way communication to update prices for all of its clients. This is a perfect use case for SSE.
SSE vs Long Polling
Long Polling is a method of communication where the client periodically hits the server for new data. This form of communication is often used when the application being built involves human intervention or executing computationally expensive tasks. Think, your DoorDash delivery status or triggering the training of a heavy machine learning model. These events take a long time to complete as they may require an update from a person or are simply just computationally heavy. In situations like these, constantly checking for the completion of these tasks may be unnecessary. SSE is usually used in applications where events are generated quickly. For example, hosting a live count of likes on a YouTube video, displaying server log files on a UI, or pushing a notification to a user’s phone. All of these events are near instant updates.
Quick Review
In short, SSE is a great tool for streaming quick real-time data. They offer unidirectional communication from a server to its clients and are typically used for updating dynamic content on web pages.
Lets display log files on a web page using SSE!
Now that we know the advantages and drawbacks of SSE, let’s use it. We will be building a web page that displays logfiles from a server in real-time! This is a great example use case for SSE as logs are events that generally update quickly. We also have no need for bi-directional communication. For this tutorial we will be using python and FastAPI. FastAPI is a great tool for SSE applications as it is really easy to use and is built upon starlette which has SSE capabilities built in. All the code shown below will be available on Github.
The code will be broken up into 2 parts: the server and the client
The Server Application
The server application will have to parts - a program that simulates our logs being generated, and a program that streams these logs.
Our log generator is a pretty straightforward. We will create a file called program.py. In it, we first create a logger object that points to our logfile. Then we will write an infinite while loop that prints some random message into our log file. We will put a small time.sleep() just to slow down the amount of logs we make.
program.py
import logging
import time
import os
# create logger with log app
real_path = os.path.realpath(__file__)
dir_path = os.path.dirname(real_path)
LOGFILE = f"{dir_path}/test.log"
logger = logging.getLogger('log_app')
logger.setLevel(logging.DEBUG)
fh = logging.FileHandler(LOGFILE)
formatter = logging.Formatter('%(asctime)s - %(name)s - %(levelname)s - %(message)s')
fh.setFormatter(formatter)
logger.addHandler(fh)

#infinite while loop printing to our log file.
i = 0
while True:
    logger.info(f"log message num: {i}")
    i += 1
    time.sleep(0.5)
Ok now we have a program that generates our logs. Now let’s stream these logs with SSE. To do this we will be building a quick webserver using FastAPI. There are some python libraries you need installed for this code snippet to work so I highly recommend you follow my setup instructions on the Github readme before you proceed. We will write all our server logic in a file called server.py.
The webserver code can be broken up into three parts: imports and server setup, our SSE generator, and our server endpoint. Let’s go through each part:
Imports and Server Setup
server.py
from fastapi import FastAPI, Request
from sse_starlette.sse import EventSourceResponse
import uvicorn
from sh import tail
from fastapi.middleware.cors import CORSMiddleware
import time
import os
#create our app instance
app = FastAPI()

#add CORS so our web page can connect to our api
app.add_middleware(
    CORSMiddleware,
    allow_origins=["*"],
    allow_credentials=True,
    allow_methods=["*"],
    allow_headers=["*"],
)
real_path = os.path.realpath(__file__)
dir_path = os.path.dirname(real_path)
LOGFILE = f"{dir_path}/test.log"
The main imports you need to know about here are FastAPI, EventSourceResponse, and tail. FastAPI will enable us to quickly build a webserver. EventSourceResponse is a function from the sse_starlette library that converts python generator objects into SSE signals. the tail function from the sh library lets us infinitely tail a file and prints only unread lines. This will be crucial in us developing a logger as we only want to display lines that users have not yet seen. After we complete our imports, we create an instance of FastAPI. We also add some CORS middleware to allow our server-sent events to be accepted by our clients.
SSE Generator
server.py
#This async generator will listen to our log file in an infinite while loop (happens in the tail command)
#Anytime the generator detects a new line in the log file, it will yield it.
async def logGenerator(request):
    for line in tail("-f", LOGFILE, _iter=True):
        if await request.is_disconnected():
            print("client disconnected!!!")
            break
        yield line
        time.sleep(0.5)
Thanks to the EventSourceResponse function, we can send python generators as server-sent events. Our generator is defined in the logGenerator function. It uses the tail import to indefinitely follow our log file and yield new lines anytime the file is updated. We will also add a sleep function to slow down the speed of the generator. This will make it easier for us to follow the logs as they print on the web page. You may be wondering why the function is asynchronous and what the request.is_disconnected is doing. I’ll explain that later on.
Server Endpoint
server.py
#This is our api endpoint. When a client subscribes to this endpoint, they will receive SSE from our log file
@app.get('/stream-logs')
async def run(request: Request):
    event_generator = logGenerator(request)
    return EventSourceResponse(event_generator)

#run the app
uvicorn.run(app, host="0.0.0.0", port=8000, debug=True)
Last but not least, we have our server endpoint. We create a route “/stream-logs” which will create an instance of the logGenerator and return is as an EventSourceResponse. An EventSourceResponse is starlette’s representation of a server-sent event. You may notice that our run method takes in a request object and passes it on to the logGenerator. One cool advantage of starlette requests is that we can monitor the entire lifecycle of a client’s request. This lets us to break our generator and save resources whenever we detect that a particular client has disconnected. This is what the “request.is_disconnected” logic does in the logGenerator. The final line in this snippet runs our web server on your localhost on port 8080 and can be accessed like this: http://0.0.0.0:8000/
The Client Application
Our Client application is very simple in comparison to the server. It is one html page that subscribes to our server. It will be named client.html
client.html
<!DOCTYPE html>
<html>
<head>
<style>
#logs {
background-color: black;
color:white;
height:600px;
overflow-x: hidden;
overflow-y: auto;
text-align: left;
padding-left:10px;
}
</style>
</head>
<body>
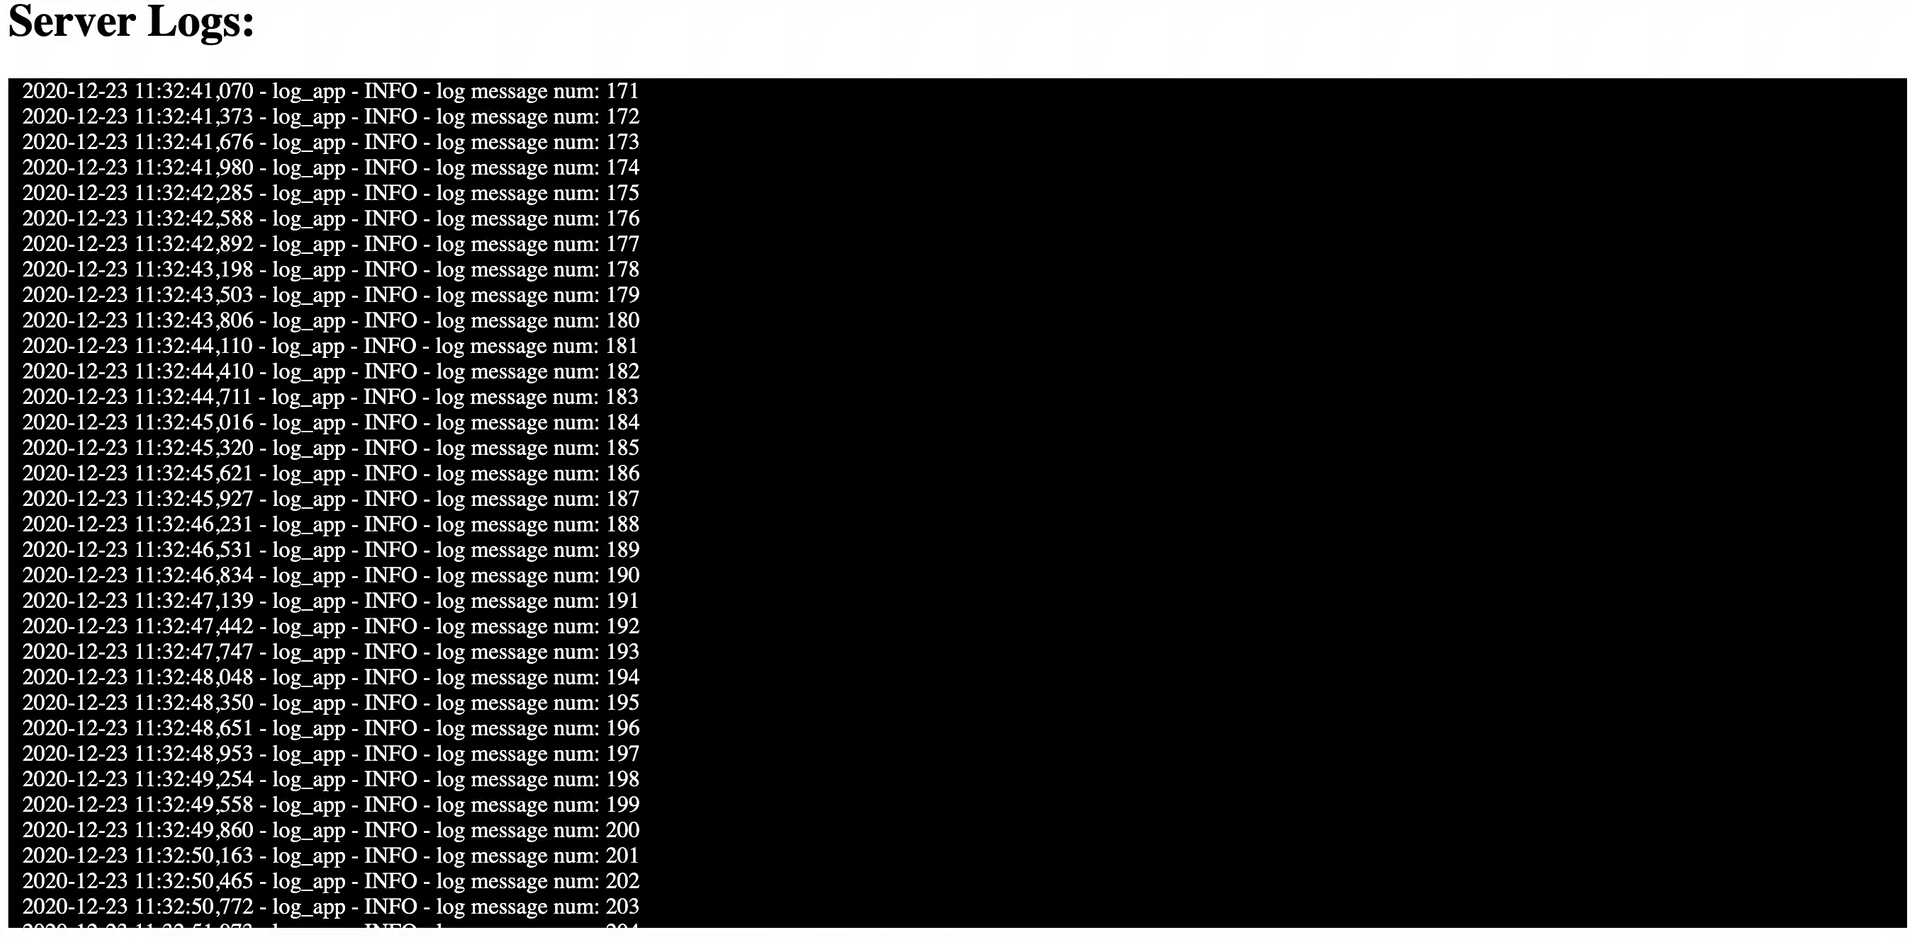
<h1>Server Logs:</h1>
<div id="logs">
</div>
<script>
var source = new EventSource("http://localhost:8000/stream-logs");
source.onmessage = function(event) {
document.getElementById("logs").innerHTML += event.data + "<br>";
};
</script>
</body>
</html>The only part worth discussing in this file is the script section. Here we create a new EventSource variable called source. our source var denotes that our client has subscribed to our server’s stream-logs endpoint. The onmessage function of our EventSource object lets us program a custom action anytime we receive a new message from the stream. In our case we will be modifying a div and appending our log data there. (I attempted to style this element to look like a console)
Lets Run It!
Awesome! We have our server and client code written up. To make this work we first need to run our server and logger files. Once both are running, we can open the client html in any web browser. I go into detail on how to run these scripts on the project Github page as well! Thanks for following along!